Sunday, October 20, 2013

Photo Shoot: Erza Scarlet Heaven's Wheel

Hello friends!

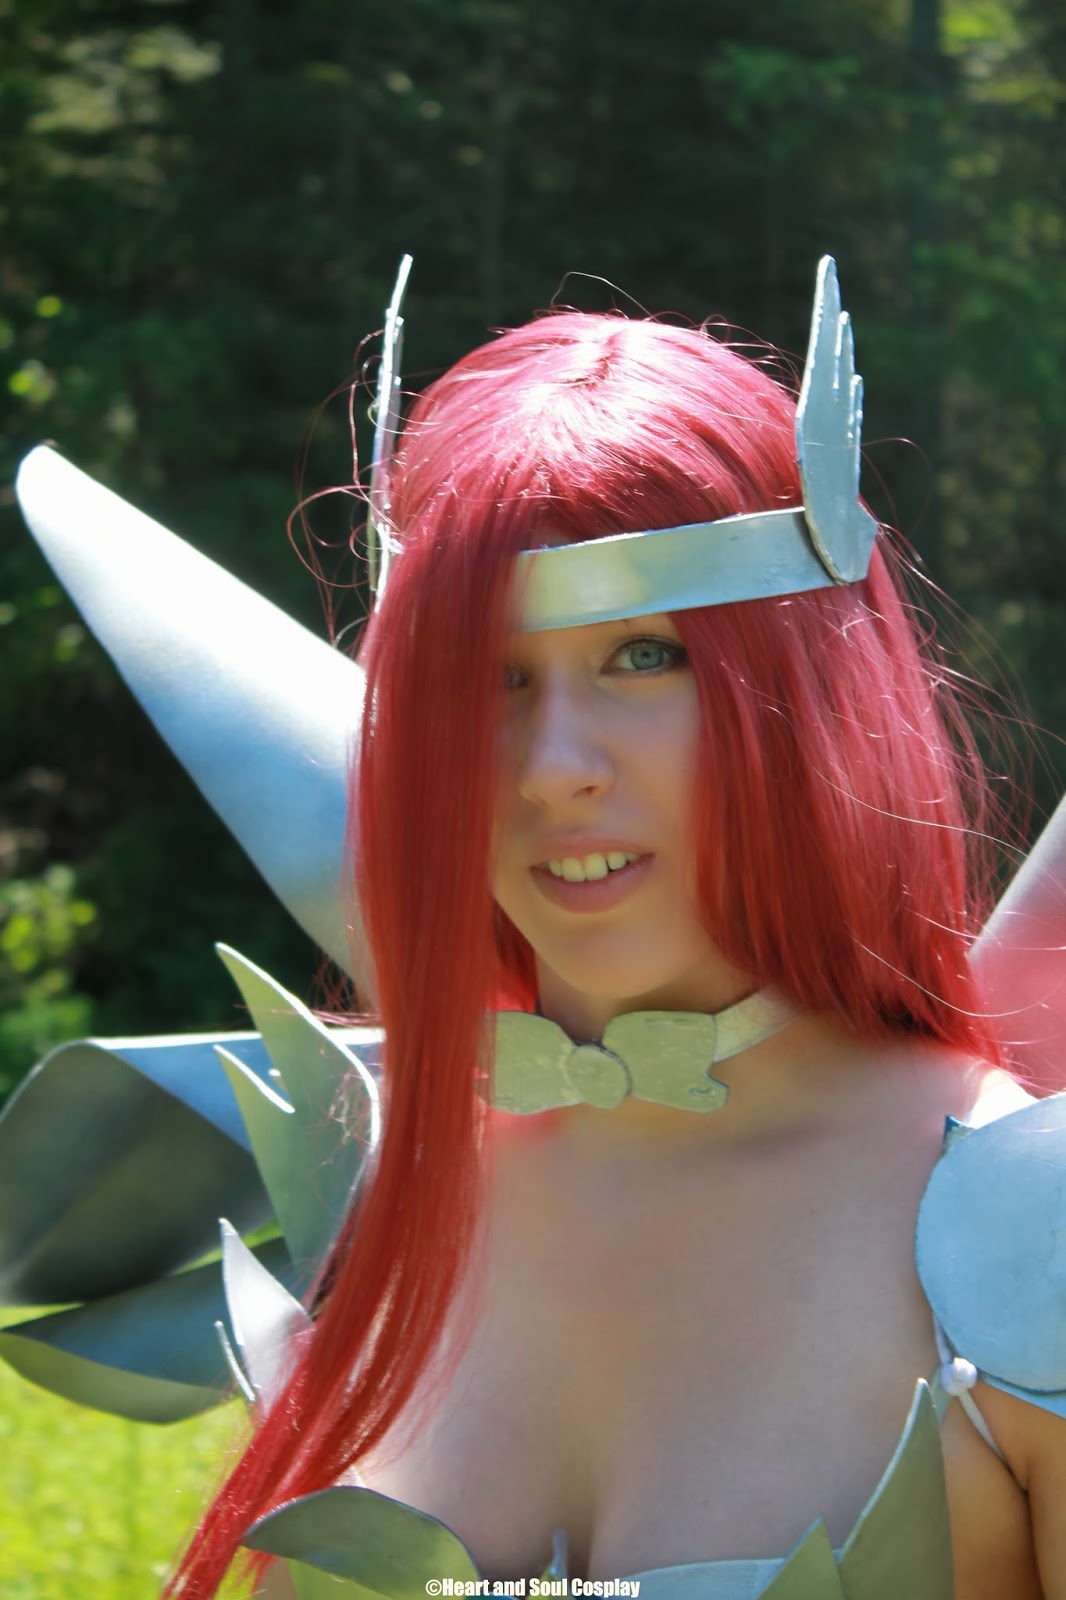
TL;DR-- here are some photos of me cosplaying as Erza Scarlet's Heaven's Wheel cosplay from Fairy Tail.  The cosplay was completed in spring of 2012 after a whole winter's worth of work.  Photos taken by my husband at the base of the trail to Strawberry Lake in the Rocky Mountains.  Skip the big chunk of text below to get to the photos ;)

The long version:  In summer of 2012, I decided I wanted to do a photo shoot of my Heaven's Wheel cosplay.  I had spent hours, blood, sweat, and tears on this cosplay.  It was my first "armored" cosplay, and I learned so much from doing it and was so proud of it that I wanted a photo shoot to get some good photos to do it justice.  Well, let's just say my photoshoot didn't quite turn out the way I anticipated, but I learned a lot from that experience as well.
          Lesson 1:  Always bring a mirror, especially if you are going to shoot the photos in the middle of the woods! This should've been a no-brainer, but I didn't own a a hand held mirror and assumed I could rely on the rearview and side mirrors of the car.  Well, that didn't quite cut it.  My headpiece ended up sitting much lower than intended.  Being the perfectionist that I am, I wanted to scrap all the photos we took over two hours and start over, but that leads us to lesson 2....
          Lesson 2:  Hot glue, craft foam, and wax-based paint do not hold up well in 85ºF weather.  My armor ended up splitting apart at the seams, and I'm pretty sure there was more silver paint on my body than was left on the armor by the end of the photo shoot.  So redoing the photo shoot is not an option unless/until I re-make the cosplay.  I'll admit, it was pretty discouraging to have my cosplay come apart before my very eyes, and I may or may not have cried a little.  However, I have since discovered thermoplastic materials such as Wonderflex and Worbla, and any armor cosplays I do in the future will be built from those materials.

I have to say, it is thanks to the encouragement of my husband that I have decided to post these photos.  For the first six months, I was adamantly against even looking at them because I felt so silly that I couldn't even get my headband in the right place without a mirror, but eventually my husband got it through my head that the photos still turned out nice.  So, here they are and I hope you enjoy :)


Don't pay any mind to my melting wing haha


Gratuitous out-of-focus artsy shot


Thank you for taking the time to look at my photos.  I think my husband did an awesome job taking the photos, and the forest was beautiful despite all the horse-flies pestering us.  The whole experience with this cosplay taught me a lot, and I'm looking forward to making more armored cosplays.  I have another one of Erza's that is really on my mind, in fact :)

As always, feel free to leave a comment or hit me up on email or Twitter!

Sincerely, 
Alycia
heartandsoulcosplay@gmail.com
@whimsyAly

Tuesday, October 15, 2013

Makeup Tutorial: Moka Akashiya

Hi everyone! I recently created a video makeup tutorial demonstrating the makeup I used for my cosplay of Moka Akashiya, from Rosario + Vampire.  It was one of the first cosplays I ever did, and while there are definitely things I would change now that I have learned more, I think it still turned out very well.

This cosplay was also done before I knew colored contacts were easily available for ordering online, so the video goes on to explain my interpretation of the eye makeup, and how I chose it to match Moka's coloring with her eyes and hair.  Watch the video below! Under the video, I'll list the products I used, and explain how I created the video :)


Products used (in order):
Revlon Photo-Ready primer
SheerCover duo concealer
Clinique perfectly real makeup
Clinique Touch Base eye primer
Coastal Scents 88 original palette
Rimmel Exaggerate Waterproof eyeliner in Emerald Shimmer
N.Y.C. white eyeliner
Clinique eyeshadow in Frosted Blossom
Maybelline Falsies Mascara
Clinique Quick-Blush in Berry on Time
Clinique vitamin C lip smoothie in Pink me Up
Rimmel Stay Matte pressed powder


Video creating details:
All content was filmed and edited by yours truly :) I used iMovie for all the editing purposes.  Music is opensourced from http://opsound.org/artist/theorchestralmovementof1932/ .  The song is "Home" and you should totally check some more of their music out.

If you have managed to read this far, thank you so much! This is the first time I've ever filmed a tutorial and have talked straight for like 17 minutes straight, and to be honest I'm super nervous about putting myself out on the Internets in this format.  It was a good experience, however, and I had a lot of fun editing and putting the whole video together.  Depending on the feedback I get, there may or may not be more of these in the future, so let me know!

Sincerely,
Alycia

Friday, October 4, 2013

Cosplay Update: Morgiana's Top.

Welcome back, everyone!

What I will show you this week is how I made the top for my Morgiana, from Magi, cosplay, specifically her dancing outfit.  It looks a lot like a tube top, except the fabric appears to be gathered and twisted, and depending on what image you look at, there is a gold circle in the middle of the top.  There are also drape-y pieces of fabric that hang from her top to her bottom, but I've decided to make those detachable and will add those in later.

I started with a nude strapless bra.  I like having the structure and security of a bra that fits snugly, and it worked great as a form to fit my fabric to.  To get the dimensions of the fabric I needed right, I measured around myself as I was wearing the bra, and then then measured the height of the bra.  The piece of fabric I needed would be rectangular, approximately 7 inches tall by 34 inches wide.  I actually made the rectangle a bit bigger than this so I would have extra material to drape and shape the top with.
Here come the pictures~!  I used my dress form, and pinned the fabric into place while the bra was on the form.


I pinned it while on the dress form because it will then keep that proper shape when I sew it into place off of the dress form.  So when I took it off the dress form, you can see below it became all baggy and out of shape appearing, but just for a trial I tried it on myself, pins and all, and it fit exactly how I needed it to.


For the sewing, it was fairly easy along the cups.  I hand-sewed it all, and not in a continuous line.  I chose several points, such as the top and bottom of each up, and along where the elastic starts, and just sewed back and forth over a tiny stretch.  Sewing along the elastic proved tricky, because I needed to be able to sew while stretched out so the fabric stayed in place.  I asked for Brenton's help here.  It went smoothly in this case, except he did get a little nervous when the needle got a little close to his leg!  I used the same tactic here as I did over the cups, just hand sewing at different points.

If you look closely here you can see a couple of my stitches,
The after photo, all sewed into place.
One last time I strapped it back onto my dress form just to make sure it looked good from all angles.   I'm really happy with how it turned out.  The back is a little messy, but it will be covered by her headdress and/or hair, so I'm not worrying too much about it.  


The last little gem is the gold circle on the top.  It actually serves as an attachment point for a chain that dangles from her necklace.  I found an awesome pin at the thrift store without even really looking-- it was just one of those things that jumped out at me and I knew it would be exactly what I wanted for this cosplay.

Thats it for this week.  If you managed to read this far, thank you so much! I'm still making steady process on this cosplay, slow but steady due to working, working out, and spending time with friends and family.  It's coming together really well and I'm so happy to share my progress with you. I hope you are as excited as I am to see the final result!

Sincerely,
-Alycia

Sunday, September 29, 2013

Quick Update: Morgiana's headdress

Hi there everyone! I hope you all are doing well.  I've been keeping myself consistently busy with my Morgiana cosplay.  In my last update, I had nearly finished the headdress for my Morgiana cosplay.  All I needed to do was add the fabric that drapes down from the back of the headdress to her mid-back.  Honestly, figuring out where the fabric started was the source of some frustration-- in the manga, the fabric seems clipped into her hair, whereas in the anime it is actually attached to her headdress.  So, I decided to have the fabric attach to the headdress for my cosplay.  Actually, throughout my research into this costume, there are several differences between the anime and manga versions.  When something like this happens, I will incorporate whichever features I like best.  

Here are a couple photos of the headdress:


I was overall pretty happy about how it turned out, but the length of fabric just seemed so.... un-glam compared to the rest of the headdress, so I decided to add a little bit of pizzazz.  Gold seed beads! I sewed them in groups of two along the bottom of the headdress to add just a hint of sparkle.  


I feel like the beads add a nice, subtle bit of glam to the fabric.  I didn't want to go overboard, but the rest of Morgiana's dance outfit has pretty trim along it so I thought the headdress' fabric deserved a little love.  They seem to show up okay, and I hope they will sparkle nice in the sunlight.  

I've been working hard on the rest of this cosplay and have made good progress, so check back next week for another update.  If you need me in the meantime, leave a comment below, hit me up on Twitter, or shoot an email to heartandsoulcosplay@gmail.com!

Until next time, everyone!
-Alycia

Saturday, September 21, 2013

Super exciting thrift store find!

Hello there!

So every once in a while I like to hit up local thrift stores to look for things I can use for cosplaying purposes, such as jewelry that can be incorporated into a costume, or clothing that can be taken apart or altered to what I need.  Plus, sometimes there are cute little knick knacks that I never know I need until I see them.

Recently, I was in the local Salvation Army when I come across something I've always dreamed of finding, but never thought I would be so lucky.  It is a beautiful, vintage appearing, lace shirt.  Here are some photos of my lucky find!


Aahhhh, isn't it beautiful.  You'll cry when I tell you how much I paid for it.  $4.75.  Yep, thats right.  I nearly cried tears of joy also.  Here, have some close up pictures of the details:


At the collar on the front, and in the middle of the shirt there are the cutest little floral and white seed-bead details.  The middle of the shirt has a heart even! And look at the gorgeous lace and gentle, scalloped edges! 


The bottom of the shirt has a ribbon tie, some more lace detail, and a gentle point in the front and back.

Speaking of the back of the shirt, the neckline and collar area seems pretty simple in comparison to the front, but when you look closer at the buttons, they are actually little flowers! I see them as roses, but I suppose thats open to interpretation.  


The sleeves of the shirt should not go unmentioned, either! The scalloped edge of the lace along the sleeves is not sewed down, so when the sleeve is on the arm the lace stands out a bit.  There is also a ribbon drawstring on the end of the sleeve to draw it tighter around the wrists.


I spent a good half-hour on Google trying to figure out a little bit more about this shirt, but none of my searches produced anything.  Granted, I don't know very much about researching vintage clothing (I'm calling this shirt vintage because it appears that way, and don't have any evidence to make me think otherwise, so there!) so my searches were mostly the name I found on the tag.  I even searched for the brand name on eBay and didn't turn up anything.  So if any of you guys feel like looking into this for me, let me know what you find!

I'm thinking of designing an original costume with this shirt, something along the lines of the Elegant Gothic Lolita style, or maybe a steampunk creation? I don't know yet, but whatever I do, I'm gonna be super excited! For now, I have a couple other cosplays I'm working on and planning out, so this shirt is going to be kept safe until the moment is right.

Any questions or comments about this shirt, or anything else cosplay related? Hit me up on Twitter (@whimsyAly) or email heartandsoulcosplay@gmail.com.

Until next time!
-Alycia

Friday, September 13, 2013

CosplayUSA appearance!

Hi everyone!

So about 4 or 5 months ago, the bimonthly publication "Otaku USA," put out a call for photo submissions from its readers for a cosplay edition of their magazine.  Being a loyal reader of 2 years, I took a chance and submitted a couple photos, one of myself individually, and one of Justin and I in our Final Fantasy VII cosplays.  Then, I waited.  I would eagerly check my messages each day to check for confirmation that they got my submissions, and with each passing day I got more nervous.  Did they not like them? Did they even get the message I sent?  Gradually, I forgot about the whole situation.  

Then, one fateful day in mid-July, I suddenly got a response.  They were requesting formal permission to use both of the photos I submitted! Naturally, I was ecstatic and said YES! I spent the rest of the day on cloud nine, and couldn't wait to tell Brenton, Justin, my parents, my friends.... you get the idea.  Now, the wait was on for August 27th, when the print edition would be released.  I was so excited the morning of that I got up early and went to Wal-Mart before work to pick up all the copies they had on the shelves.  Mission success! Here, have some pictures of the magazine and inside.  I will have more to say after that.


See us?! They put Justin and I on the right page with some other great Final Fantasy cosplays, and put me in my Erza Scarlet cosplay on the left bottom side, next to fellow Fairy Tail member Gajeel :D

In case you haven't picked up on it already, I'm pretty dang happy they accepted both of our submissions.  We've made it into some fantastic cosplay videos before, which we've definitely been totally psyched about, but there is just something about being in a print magazine, a nation publication, that makes my heart skip a beat.  To be honest, sometimes I have these nagging moments of self-doubt where I tell myself it was just a call for photos, an open submission.... but then I think, so what? They obviously thought they were good enough to be published, and that alone makes me really happy.  Not just Justin and I, but my whole family and friends supported me in making all of these cosplays, whether it was accompanying me while shopping for materials, helping me spray paint parts, making the huge Buster Swords, or making sure we made it through the convention hall unscathed or not knocking anyone else out.  So I am grateful and honored to have had our photos accepted.

That leads me to say first to my family and friends, thank you for your love and support, and I hope to continue to earn and receive that.  Second, thank you to Justin for being an awesome cosplay partner, spending long hours on our feet holding twenty-plus pounds of prop weapons.  Last but not least, thank you to Otaku USA for the opportunity to be in this great cosplay edition.  Not only are Justin and I in the same publication that has some of our cosplay idols gracing the pages, but we also learned of new cosplayers to learn from and admire!

Justin also has a few thoughts he'd like to get out! Read on~

It's pretty exciting to be able to be recognized as your character, let alone to be recognized for how well your cosplay was made! One thing that always makes a cosplay better is having both the support from friends (and family) who will be there dressed up with you. It is both a surprise and an honor to have been published in Otaku USA magazine, but we would have never have been there if it wasn't for the positive feedback that we get from fellow cosplayers and anime lovers alike!

~~~
And that is what we both have to say about our appearance in this magazine! We hope you enjoyed our thoughts and feelings, and will continue to look forward to our future cosplays and interactions.  We appreciate your support!

Sincerely, 
Alycia and Justin of Heart and Soul Cosplay

Friday, September 6, 2013

Morgiana Cosplay Update: Accessories!

Hi everyone!

I can't believe it's already September.  Time just seems to be flying by lately, so I do my best to make the most of each day!  My summer definitely had it's ups and downs, but let's hope fall is smooth sailing.

This post today contains updates on my ongoing Morgiana (dancing outfit) from Magi cosplay.  I've finished the accessories and this is my write-up on how I achieved that.  This post seemed a little long to me, so I put markers like *~*~*~*~*~* in between each section.  First is the overall accessories, then headband construction, then a blurb on airbrushing silk flowers.  Enjoy!

If you remember my last cosplay update, here, I had an unproductive run-in with metal leaf.  While it looked promising, it just didn't produce the results I was hoping for, so I turned back to my first love in creating a realistic metal appearance-- Rub 'n' Buff.  This time I picked up a couple tubes in "Antique Gold," and I couldn't be more pleased with how my accessories turned out.  Behold!


Aren't they wonderful?? Okay so maybe not everyone sees what I what I do in them, but they are exactly what I pictured in my head.  They look metallic, but aren't super shiny. They were all custom-molded to myself while the Wonderflex was still warm and malleable, so they fit just how I want them too.  The ankle cuffs have some Velcro glued to them so they stay put!

The metallic color was achieved through the following steps:  I applied one layer of Rub 'n' Buff, then buffed it with a clean rag, applied a second layer, buffed it again, then sealed it with acrylic floor wax.  

The gem on the torque was lovingly sculpted and painted by my husband.  We decided on a silver setting to help it stand out a bit against the gold.  Superglue is holding it in place.  Never underestimate the power of superglue.  

*~*~*~*~*~*

The next accessory I'm going to write about is the headdress Morgiana wears in her dancing outfit. It is a thick gold headband that has more gold dangling from each end, layered with pink and blue flowers, and has a gold ring on the left backside of the band that a tuft of hair sticks up through.  Depending on what image you look at, the anime versus the manga, there is also cloth attached to the back that drapes down to the small of her back.


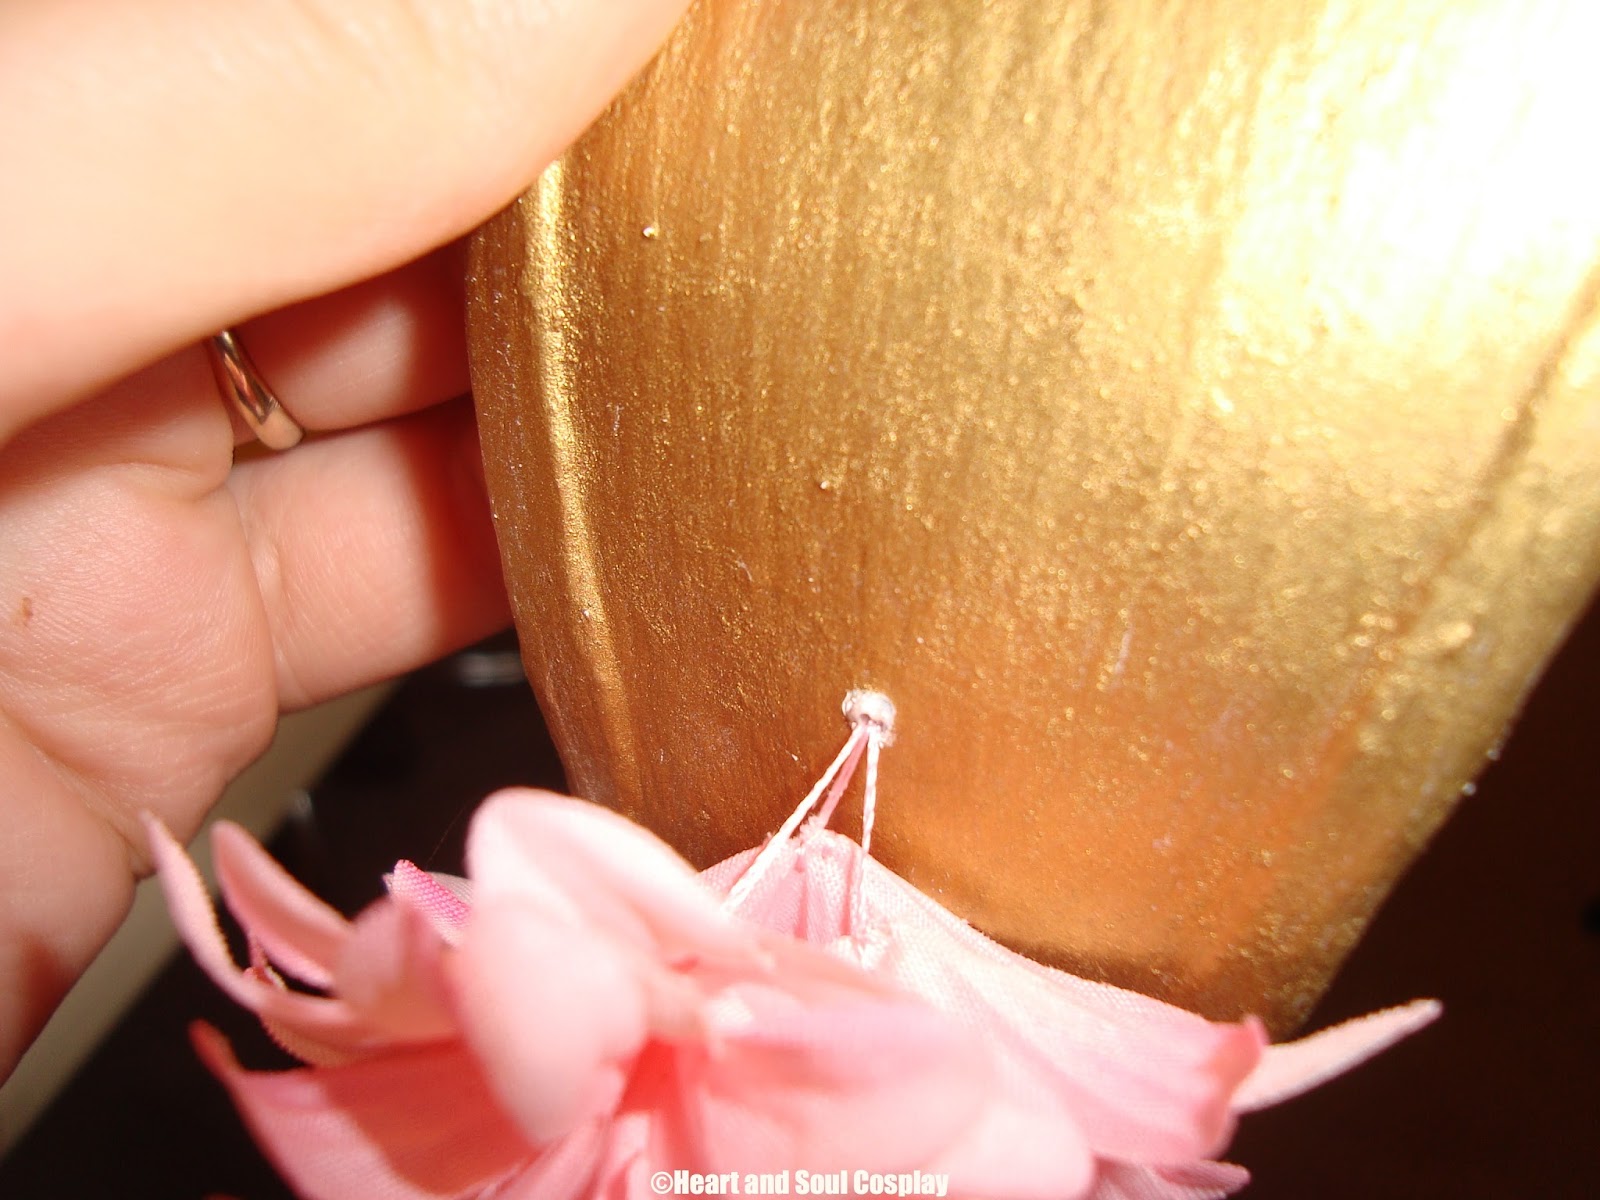
In advance, I made the headband and Rub 'n' Buff'd it gold, sewed strands of pink flowers together, and found some gold earrings that matched the extra gold dangling from her headband.  My next dilemma, however, was how was I going to attach all of that to a piece of plastic with some wax-based paint on it?  Despite how much I love and trust superglue and hotglue, I just didn't think they could handle it by themselves for this project.  I consulted my husband, and he handed me this little tool:

A miniature, hand-powered drill! I don't know if it has a more official term, but I think it's just a small drill-bit shoved into an x-acto handle.  Well, whatever it is, it works.  It drilled through the plastic without cracking it, or demolishing the paint.  


I actually used with existing earring hook and threaded it through the little hole I drilled.  I secured it on the underside with some superglue and felt.  I also threaded the flowers through the upper hole.  On the right side, there only is pink flowers so I made an extra bunch of flowers for the top to hide where the strings go in.  All of the flower thread was secured on the underside with superglue.


This side doesn't have the extra bunch of pink flowers at the top because it will have the large blue flower covering it.
*~*~*~*~*~*

For the blue flower on her headdress, I searched every store in town to find something even remotely similar to what is depicted.  I interpreted it as a blue lily, so I blue lily is what I scouted for.  As it turns out, you can find plenty of blue silk flowers, but I had no luck with a lily.  So I decided to take matters into my own hands.  I found the perfect bouquet of white lilies at Wal-Mart, they were evenly sized and large enough for what I wanted.  My husband also happens to own an airbrush, so herein begins my experience with airbrushing!

Firstly, I decided which flower I wanted to use, then separated it into its individual pieces.


Secondly, I gathered the materials I would need.  I would recommend using an air mask and gloves as a start for personal protective equipment.

The magic machine!

The magic tool! Sorry for the glare.

Thirdly, I had a bottle of water nearby because it's important no to let the well run dry.  Under my husbands instruction, we played with colors of his acrylic paint and watered it down until it was approximately the consistence of thin milk.  I set up a backdrop out of a folded piece of poster paper, but a cardboard box would've made a nice painting booth also.  After a few minutes of practice, I felt ready to paint my flower!  I painted both the top and underside of each set of petals, and the stamen parts. I would also like to note its nearly impossible to make two batches of paint the same color you want, so always error on the side of too much paint than not enough.  But, I'm really happy with how it turned out! 


Looks pretty spiffy, I think!  To attach it, I used a combination of strong-arm sewing techniques (meaning I really had to wrestle the needle and thread through the body of the flower) and superglue! Here is the end result!


Honestly, it looks a lot better without my hand in the middle of it haha.  I've also done more work to it that I will add photos of in a future post. Now that I'm done with the accessories for this cosplay, I can start the sewing! I'm both excited and nervous for this part, but I'll take photos to share along the way!

That's it for now, folks! Drop me a line in the comments below, via email through heartandsoulcosplay@gmail.com, or hit me up on Twitter if you have questions or topics you want to see me write about!

-Alycia