Way back in 2011-12 when I decided to create my first "armor" cosplay and had no idea what to make it out of, I discovered a seemingly-simple and inexpensive way to create good-looking armor, by using this tutorial: http://entropyhouse.com/penwiper/costumes/helmsdeep.html
Since you can get the specifics of the process by clicking the link, what I'm going to do is share my experience and thoughts with using Rub 'n' Buff, and provide some photos for reference!
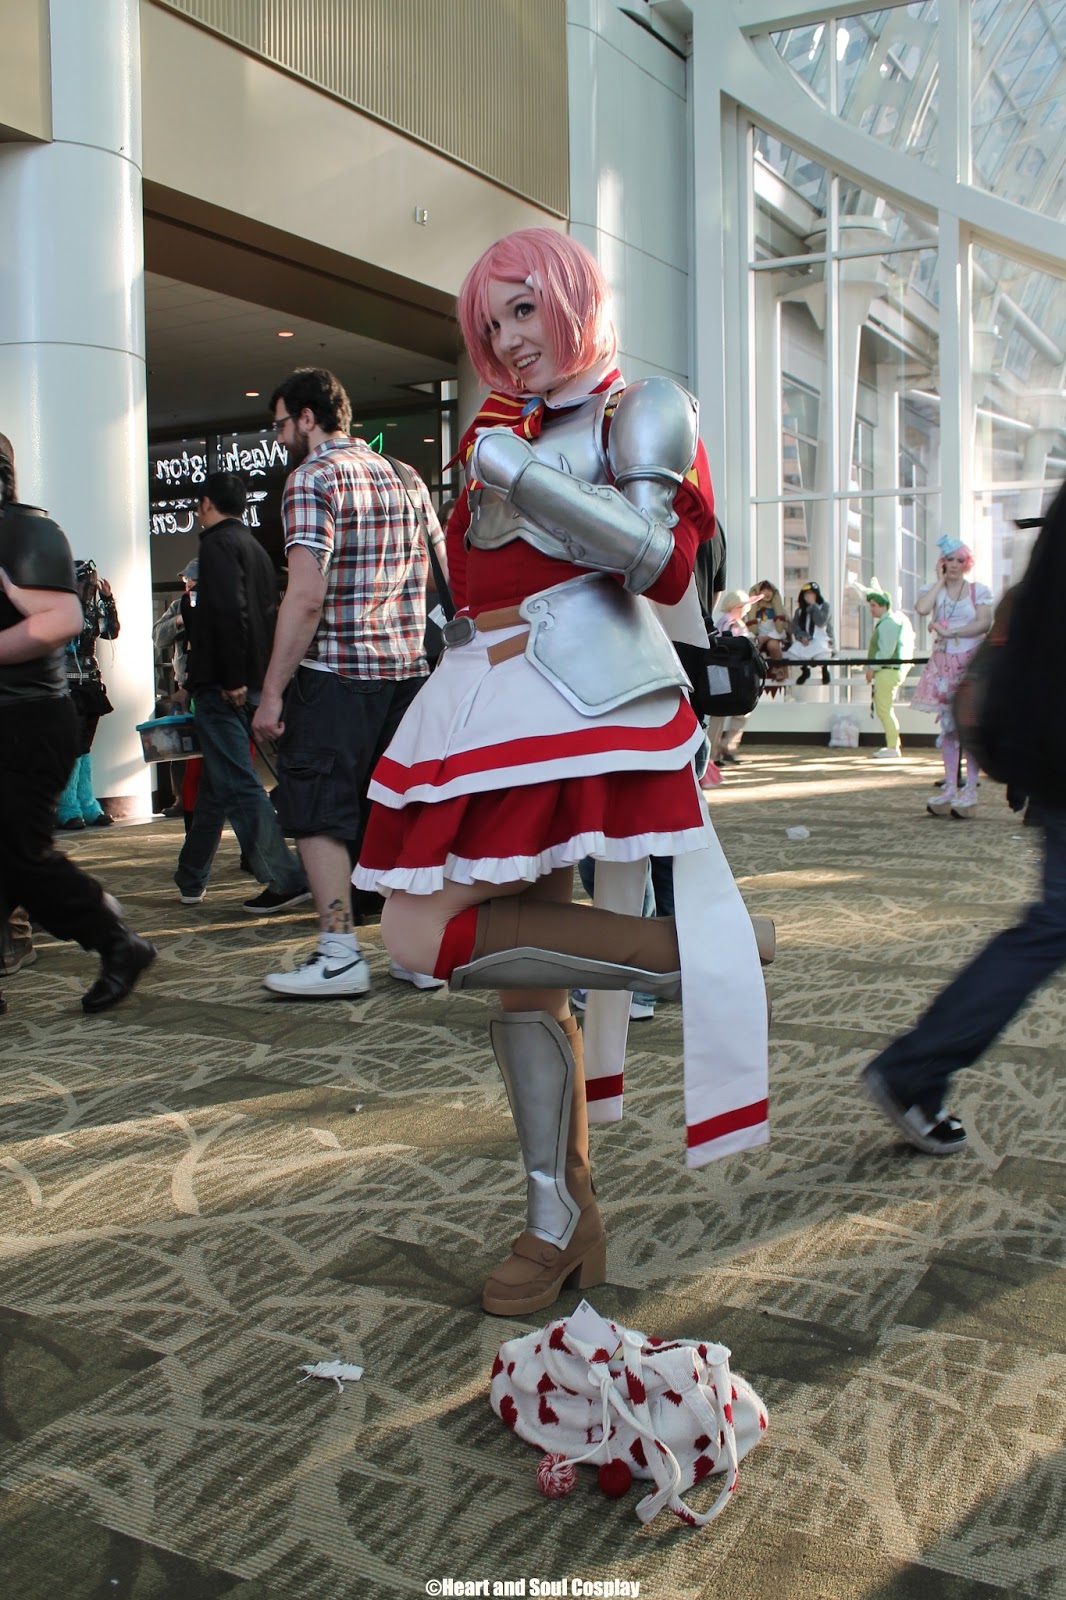
So what is Rub 'n' Buff? Its a wax-based metallic paint that you rub on to the surface you wish to cover, and you buff it until it is shiny. Sounds awesome? It is awesome! I haven't found a surface it won't stick to, including my hands and clothes! For my first time creating "armor," this was a great material to work with, and I was very impressed. Here is the end result:

First off, with the exception of the wings and swords, it took approximately two tubes of Rub 'n' Buff to make this entire costume. I used two different tints-- the lighter color is Silver Leaf, and the darker color is Pewter. I have half a tube of Pewter left, and used up two and half tubes of Silver Leaf in the entire creation of this cosplay. The craft foam (yes, the craft foam you find in stores and make cute little turkeys cut out in the shape of your hand from) is covered with about 8 to 9 layers of a soup made from half Elmer's Glue and half water. The Rub 'n' Buff went on incredibly easy and only required one layer to create an even, thorough cover. This is in contrast to, say, a metallic acrylic paint which requires multiple layers to get even coverage.
Here are some photos I took tonight, contrasting two different materials, with and without a primer, and how the Rub 'n' Buff looks on each.

My well-used tube of Silver Leaf. Mix it up in the tube before squeezing some out so that it's evenly mixed.

My test material-- Red= craft foam, White = Wonderflex. The pieces covered in black had a quick layer of a plastic primer sprayed onto them. If you are covering a piece in Rub 'n' Buff to use in a costume, use a primer or sealer of your choice that will give smooth, even coverage (see above reference to Elmer's Glue.)

Make sure you have a decently ventilated room to paint in, because this stuff is pretty smelly. It has a sharp, nostril-burning smell. It doesn't linger for long, and is hardly noticeably once it is dry (unlike fiberglass resin, per se.) It's also important to wear gloves. Although it washes right off of skin, it is a chemical, and any time we can reduce our chemical exposure is a good time. I have also had problems with wearing a hole through my rubber gloves if I'm spending a lot of time rubbing the paint on, so watch out for that.


So a little bit smaller than pea-sized amount spread easily over these two sample craft foam pieces. And even with the piddly amount of primer I used on the left example, it went on a lot smoother, and I had to use a lot less, whereas with the unprimed right piece, the Rub 'n' Buff wanted to soak in and not spread around.

Overall, the Rub 'n' Buff did spread a lot smoother on the Wonderflex, but that is because the Wonderflex already has a smoother texture than the craft foam. The small bit of primer I used on the left did help, though.

An up close shot of the Wonderflex with primer. You can see the Wonderflex is still textured, but not to the extent the unprimed sample is.

Oops! This was the ungloved hand I used to take photos with. The Rub 'n' Buff can get pretty messy if you're not careful.

So, as in the tutorial I linked above, I sealed the Rub 'n' Buff with the above floor finish. It provides a nice sheen, and offers mild protected from everyday wear and tear on your project.

Last photo! On the right side I put a streak of the finish and let it dry. Nice and shiny! But also smelly until it dries!
To sum it up, the pros of Rub 'n' Buff are that it is relatively inexpensive, goes on easy, looks great. Cons are, it is smelly, it's a bit messy, and depending on the material you put it on-- not incredibly durable. With the first cosplay I wore it with, the armored one in the very first photo, the craft foam was sealed with the Elmer's Glue mixture, then had Rub 'n' Buff and Pledge layered onto it. It looked great while it lasted, but I tried wearing it one hot, humid, summer day, and ended up with big silver streaks on my skin where the Elmer's Glue melted and rubbed off onto my skin. Kind of a bummer deal, but I've learned a lot since then and hope to make more awesome armor-centric cosplays in the future!
Any questions, comments, or concerns? As usual, feel free to shoot them my way, via comment, Twitter, or you can email me at heartandsoulcosplay@gmail.com. And if there is anything you would like to see in future posts, please let me know!
Until next time,
-Alycia