
I can't believe it's already September. Time just seems to be flying by lately, so I do my best to make the most of each day! My summer definitely had it's ups and downs, but let's hope fall is smooth sailing.
This post today contains updates on my ongoing Morgiana (dancing outfit) from Magi cosplay. I've finished the accessories and this is my write-up on how I achieved that. This post seemed a little long to me, so I put markers like *~*~*~*~*~* in between each section. First is the overall accessories, then headband construction, then a blurb on airbrushing silk flowers. Enjoy!
If you remember my last cosplay update, here, I had an unproductive run-in with metal leaf. While it looked promising, it just didn't produce the results I was hoping for, so I turned back to my first love in creating a realistic metal appearance-- Rub 'n' Buff. This time I picked up a couple tubes in "Antique Gold," and I couldn't be more pleased with how my accessories turned out. Behold!

Aren't they wonderful?? Okay so maybe not everyone sees what I what I do in them, but they are exactly what I pictured in my head. They look metallic, but aren't super shiny. They were all custom-molded to myself while the Wonderflex was still warm and malleable, so they fit just how I want them too. The ankle cuffs have some Velcro glued to them so they stay put!
The metallic color was achieved through the following steps: I applied one layer of Rub 'n' Buff, then buffed it with a clean rag, applied a second layer, buffed it again, then sealed it with acrylic floor wax.
The gem on the torque was lovingly sculpted and painted by my husband. We decided on a silver setting to help it stand out a bit against the gold. Superglue is holding it in place. Never underestimate the power of superglue.
*~*~*~*~*~*
The next accessory I'm going to write about is the headdress Morgiana wears in her dancing outfit. It is a thick gold headband that has more gold dangling from each end, layered with pink and blue flowers, and has a gold ring on the left backside of the band that a tuft of hair sticks up through. Depending on what image you look at, the anime versus the manga, there is also cloth attached to the back that drapes down to the small of her back.

In advance, I made the headband and Rub 'n' Buff'd it gold, sewed strands of pink flowers together, and found some gold earrings that matched the extra gold dangling from her headband. My next dilemma, however, was how was I going to attach all of that to a piece of plastic with some wax-based paint on it? Despite how much I love and trust superglue and hotglue, I just didn't think they could handle it by themselves for this project. I consulted my husband, and he handed me this little tool:

A miniature, hand-powered drill! I don't know if it has a more official term, but I think it's just a small drill-bit shoved into an x-acto handle. Well, whatever it is, it works. It drilled through the plastic without cracking it, or demolishing the paint.


I actually used with existing earring hook and threaded it through the little hole I drilled. I secured it on the underside with some superglue and felt. I also threaded the flowers through the upper hole. On the right side, there only is pink flowers so I made an extra bunch of flowers for the top to hide where the strings go in. All of the flower thread was secured on the underside with superglue.

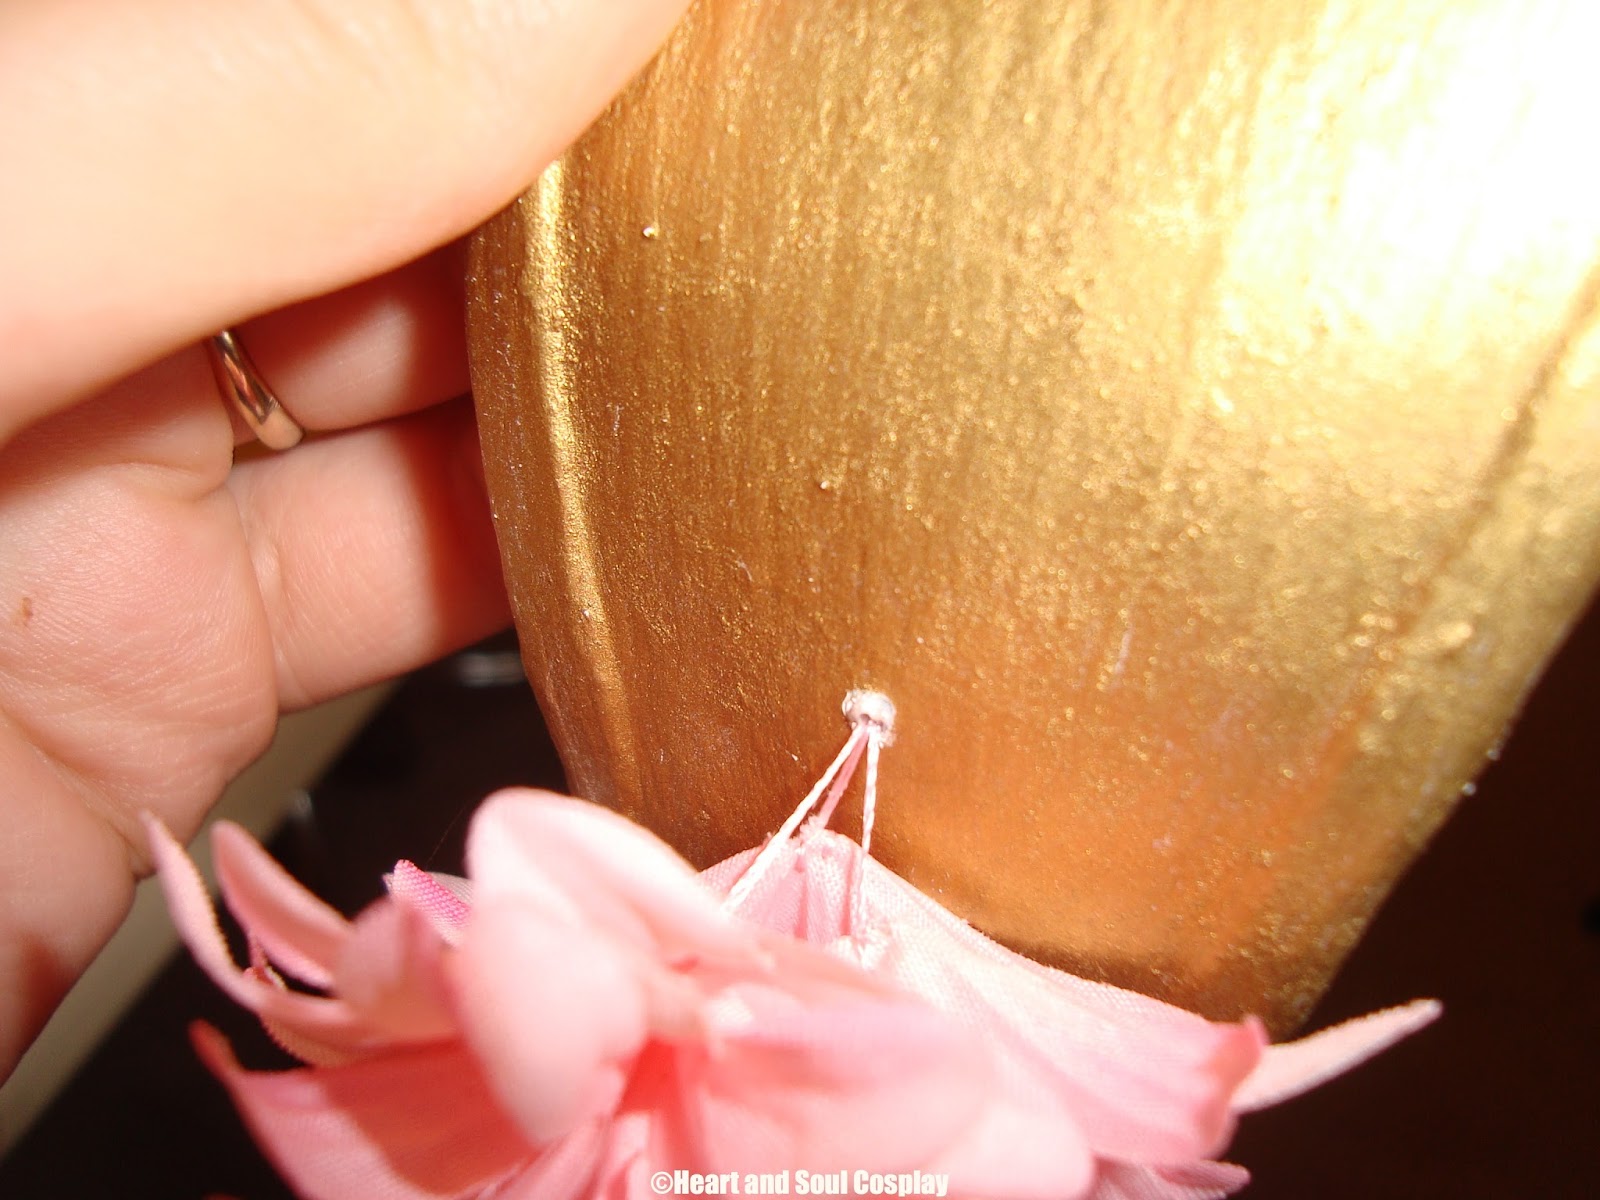

 |
| This side doesn't have the extra bunch of pink flowers at the top because it will have the large blue flower covering it. |
For the blue flower on her headdress, I searched every store in town to find something even remotely similar to what is depicted. I interpreted it as a blue lily, so I blue lily is what I scouted for. As it turns out, you can find plenty of blue silk flowers, but I had no luck with a lily. So I decided to take matters into my own hands. I found the perfect bouquet of white lilies at Wal-Mart, they were evenly sized and large enough for what I wanted. My husband also happens to own an airbrush, so herein begins my experience with airbrushing!
Firstly, I decided which flower I wanted to use, then separated it into its individual pieces.


Secondly, I gathered the materials I would need. I would recommend using an air mask and gloves as a start for personal protective equipment.

 |
| The magic machine! |
 |
| The magic tool! Sorry for the glare.
Thirdly, I had a bottle of water nearby because it's important no to let the well run dry. Under my husbands instruction, we played with colors of his acrylic paint and watered it down until it was approximately the consistence of thin milk. I set up a backdrop out of a folded piece of poster paper, but a cardboard box would've made a nice painting booth also. After a few minutes of practice, I felt ready to paint my flower! I painted both the top and underside of each set of petals, and the stamen parts. I would also like to note its nearly impossible to make two batches of paint the same color you want, so always error on the side of too much paint than not enough. But, I'm really happy with how it turned out!
 |


Looks pretty spiffy, I think! To attach it, I used a combination of strong-arm sewing techniques (meaning I really had to wrestle the needle and thread through the body of the flower) and superglue! Here is the end result!


Honestly, it looks a lot better without my hand in the middle of it haha. I've also done more work to it that I will add photos of in a future post. Now that I'm done with the accessories for this cosplay, I can start the sewing! I'm both excited and nervous for this part, but I'll take photos to share along the way!
That's it for now, folks! Drop me a line in the comments below, via email through heartandsoulcosplay@gmail.com, or hit me up on Twitter if you have questions or topics you want to see me write about!
-Alycia
No comments:
Post a Comment