I can't believe it's December 7th already! The temperature here is clocking in at -4° F, and thats without factoring in wind chill! Needless to say, I have very little motivation to bundle up and venture out in search of holiday gifts for people. That got me to thinking about home-made fandom related gifts, because more often than not, merchandise of your favorite show and character isn't just pocket change, or easily accessible for that matter.
This step-by-step post today is going to demonstrate a neat little DIY gift I learned how to make at one of the awesome Craft Day sessions I attended (you know who you are!) Basically, it involves coating layers of Mod Podge and pretty paper on to tiles, and voila, you have a cute, custom coaster. And did I mention how inexpensive it is to make? Read on for more details ;)
Supplies:
>4 (or more) 4x4" white ceramic tiles-- available at Home Depot for 16 cents each!
>Mod Podge-- $6.38 on Amazon (the bottle will last a long time!)
>Mod Podge Sealer-- $5 to $6 on Amazon (will last for many uses!)
>Foam Brush-- around 10 cents at craft store
>Scrapbooking paper-- around 60 cents a sheet, or $1 for fancier paper
>Images relating to your favorite show/video game/manga -- at most office supply stores, you can get color pictures printed for 10 to 25 cents
>Craft foam or cork board -- price varies, but not expensive
Picture time!!
1) This is step hard, and probably the most difficult choice-- Picking what characters or images to put on your tiles! Do you want them all from the same series, or just a mish-mash of your favorite characters of all time? If you are making these for a friend and know their favorite show/game/manga, you can choose a theme or any sort of image. If you can draw your own art, fantastic! That is probably the best option here. But if you are choosing images from online, don't use someone else's fanart; and while using official art may also become a gray area, don't sell the coasters for profit if you aren't using your own art. These are gifts and are supposed to make people happy! Sorry for the PSA, but sometimes these things just have to be said. Here are the characters I chose for my own coasters!
2) Decide which 4x4" portion of scrapbooking paper that you want to cover the front of your tile. Cut out your images carefully for placement onto the background.
 |
| I made a sturdy guide out of cardboard |
 |
| Trace the area to be cut on the back of the paper so you don't leave ink on the front! |
You can be as creative as you want! I wanted a simpler appearance, but feel free to spruce it up with stickers, or multiple images on each coaster. Do whatever you want!
3) The fun part. Take your Mod Podge and put a thick layer on just the tile. Carefully place the 4x4" scrapbook paper onto the tile. Then another layer of Mod Podge, then the image you want comes next. Then, you guessed it, another layer of Mod Podge! I prefer to do all 4 tiles at the same time. I use 5 to 7 layers of Mod Podge, and it dries pretty quick, so just wait until the layer beneath is tacky to add the next one.
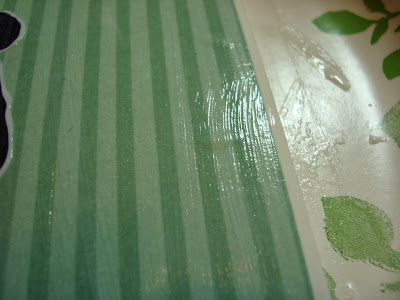
And don't worry, the Mod Podge dries totally clear! Try to keep your brush strokes going in the same direction, because it will dry in the pattern of your brush strokes. Adding multiple layers of Mod Podge will make it smoother. Oh! and the Mod Podge is pretty smelly, so try to do this in a well-ventilated area.
Uh oh! A bubble? I was pretty upset when that happened, but as soon as I let the Mod Podge totally dry overnight, the bubble worked itself out! If you run into the same fate, hopefully it works the same for you. After the Mod Podge has a chance to dry overnight, seal it with Mod Podge sealer. The Mod Podge will remain somewhat sticky unless you do this, plus sealing it will help keep any damage from happening to the Mod Podge.
4) The final step is putting a backing on the tiles. The back of the tiles is hard and scratchy, therefore likely to ruin any surface it would scoot across. While cork would certainly look classier, this is a gift to myself, so I used craft foam.
Tah-dah! Thats it! Some personalized fandom coasters for you or a friend! While inexpensive and easy to make, they are actually pretty thoughtful. And you can't go wrong with hand-made when gifting to a friend. Here is a closer look at my finished coasters:
 |
 |
Stay warm, everyone!
-Alycia


No comments:
Post a Comment